The Book Of Genit
Summary
- 1. Setup
- 2. Create a project
- 2.1 Structure of a Genit project
- 2.2 Compiling a project
- 2.3 Add pages
- 2.4 Menu
- 2.5 Main template
- 2.6 Exercises
- 3. CSS
- 4. Fragments
- 5. Passing strings
- 6. News
- 7. Public folder
- 8. Javascript
- 9. RSS Feed and sitemap
- 10. Markdown
- 11. Haml and Sass new in 2.1
1. Setup
In this chapter we will install all the programs needed to run Genit. At the end of the chapter, we will verify the success of this installation through the smoke test that comes with Genit.
1.1 Install the Ruby interpreter
Genit is written in Ruby, which means to run Genit, you need a Ruby interpreter installed on your computer. Note that you do not need to know the Ruby language you use Genit.
Genit requires the installation of Ruby version 1.9.2 or later.
Whatever your operating system, visit the official page of Ruby download and read instructions.
1.1.1 Windows users
Download the installer of the latest stable version
>= 1.9.2. As I write this sentence, it is the file
Ruby 1.9.2-p180 RubyInstaller. Once downloaded, double-click
it to start the installation.
1.1.2 Linux users
I urge you to go through a software called RVM.
For more information on RVM, visit Ruby Version Manager.
If you are new to Linux, the installation of RVM is not necessarily a
cakewalk, but hang in there, it's worth it!
Open a terminal window and type the following :
Information
If you have still decided not to go through RVM to install Ruby, but to use your package manager, it can be that your distribution offers to install version 1.9.1 of Ruby rather than version 1.9.2. You can do it, for obscure reasons, it is the same release branch.1.1.3 All users
To verify that you have installed the correct version of Ruby, open a terminal window
and type ruby-v :
    $ ruby -v
    ruby 1.9.2p180 (2011-02-18 revision 30909) [i686-linux]
If the early numbers are 1.9.2 (or higher), your system is ready to use Ruby.
1.2 Install Rubygems
Programs written in Ruby are generally packaged in the form of gem
that manage their own dependencies. Rubygems is the program that allows to
manage the different gem. It is often installed along with Ruby.
To find out if Rubygems is already installed on your machine open a terminal window
and type gem -v. If the system complains that the command gem
can not be found you need to install RubyGems, otherwise jump to the installation
of Genit.
1.2.1 To install Rubygems on Windows
Go to
rubygems.org/pages/download,
downlaod the zip file, unzip the archive and follow the instructions in the README.rdoc file.
You just have to open a terminal window, navigate in the rubygems folder and type:
 ruby setup.rb  code>. (Perhaps a double-click on the file
   setup.rb also works)
1.2.2 To install Rubygems on Linux
Use your package manager.
1.3 Install Genit
Now that Ruby and Rubygems are installed on your system, installation of Genit going to be very simple. Open a terminal window and type the following command:
$ gem install genit
The program Genit (and its dependencies if necessary) will be downloaded and
installed.
To ensure that the installation was successful, type the genit -v
command in a terminal window :
    $ genit -v
    genit 2.0
1.4 Smoke test
This step is not strictly necessary and you can skip it if you want.
However, it is useful to make sure that Genit works perfectly
on your system.
Open a terminal window and type :
    $ genit create test-project
    $ cd test-project
    $ genit compile
    $ genit server
2. Create a project
In this book, we will develop a simple website for a hypothetical video game.
The site will include a home page, a news page, and
few pages of documentation.
The first step in any development of website with Genit is the creation of the project.
This is done with the command create. Open a terminal window,
change to the folder you want then enter the following command :
$ genit create -e sample_app
By default, Genit creates a smoke test for each new project, which means that some files
are already pre-filled.
With option -e, or --empty, these files are not pre-filled.
Genit only creates HTML5 project. If you have time, look at the documentation of the create command.
2.1 Structure of a Genit project
We can now explore briefly the project structure created by Genit. If you do not understand it for now, do not worry, it's just an introduction. The content and use of each case will be treated in depth elsewhere in this book.
2.1.1 src/fragments
Here we have bits of a web page. Each fragment may be included in any page. Think in terms of fragment helps to modularize the xhtml code, like any other "real" programming language.
2.1.2 src/news
News are very common in a website. Genit can manage them easily. Each news will be placed in a separate file.
2.1.3 src/pages
All web site pages will be placed in this folder.
2.1.4 public
Here we find all files that do not require special treatment, as pdf or text files, images that are not part of site design, etc..
2.1.5 scripts
Here you can place javascript libraries and files.
2.1.6 styles
You place here that relates to site design, CSS files, images, etc.
2.1.7 src/templates
Here you will find site main template (the one that will wrap every page), as well as the main navigation menu.
2.2 Compiling a project
If you performed the smoke test in the section of the installation, you already know
how to compile a Genit project. However, I will resume the procedure here.
From the terminal window, move to the folder of the project :
$ cd sample_app
Then use the following command to compile the project :
$ genit compile
When all goes well the compile command produces no output. Also note that
cc is an alias for compile, ie the following two lines
are equivalent :
    $ genit compile
    $ genit cc
For information, the figure 2.1 shows the terminal session used since the beginning of this chapter: creating and compiling the project.
Figure 2.1 - creating and compiling the project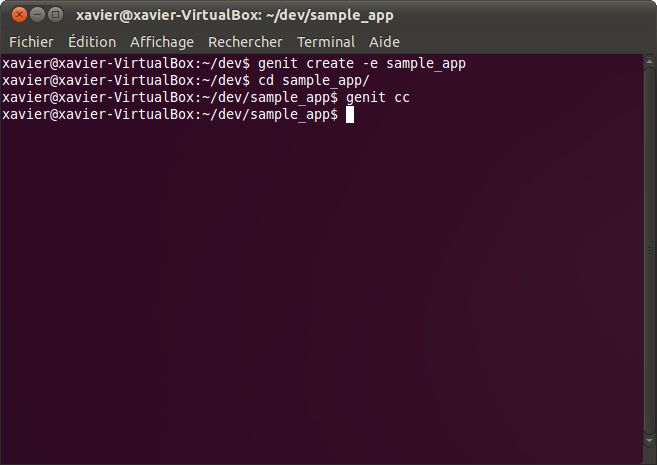
Genit put the result of compiling at the root of the project folder.
To see the result, point your browser to localhost:3000 (figure 2.3)
Figure 2.3 - The result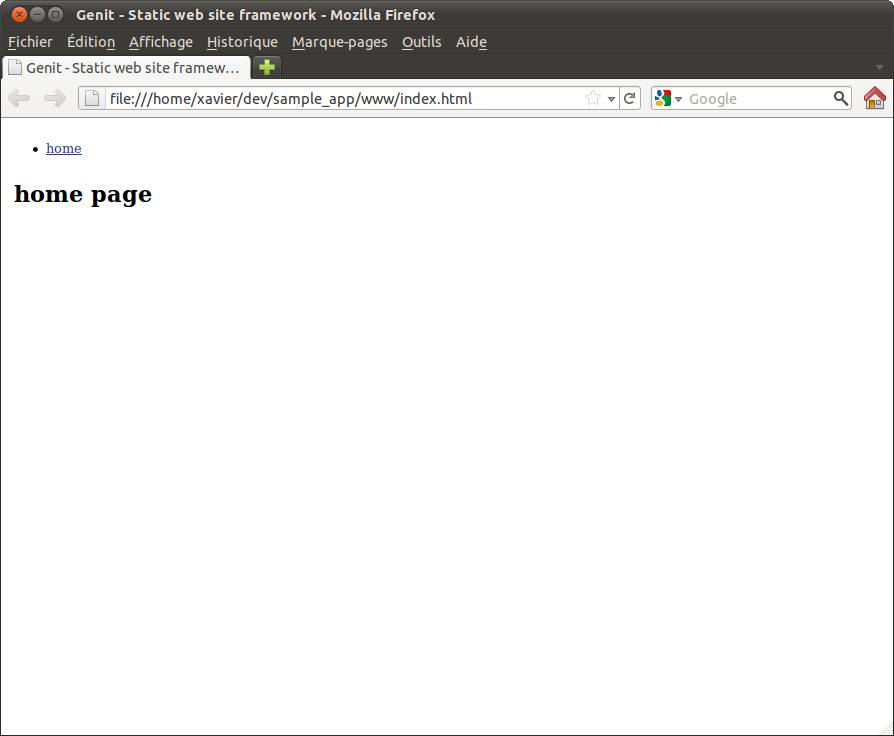
2.3 Add pages
Page index.html, you just opened at the end of the previous section
(2.2) does not come from
nowhere.
You will find its contents in the src/pages/index.html file
(listing 2.1). With Genit,
you will put all the pages of your site in the src/pages folder.
src/pages/index.html file
<h1>home page</h1>
We will now add the news page.
To do this, create the src/pages/news.htmlfile
(figure 2.4)
and fill it with the simple content of listing 2.2.
news.html file
    $ ls src/pages/
    index.html  news.html
src/pages/news.html file
<h1>news page</h1>
Use the compile command to reflect changes :
$ genit cc
You can now point your browser to localhost:3000/news.html (Figure 2.5), which just add to your site.
Figure 2.5 - The news page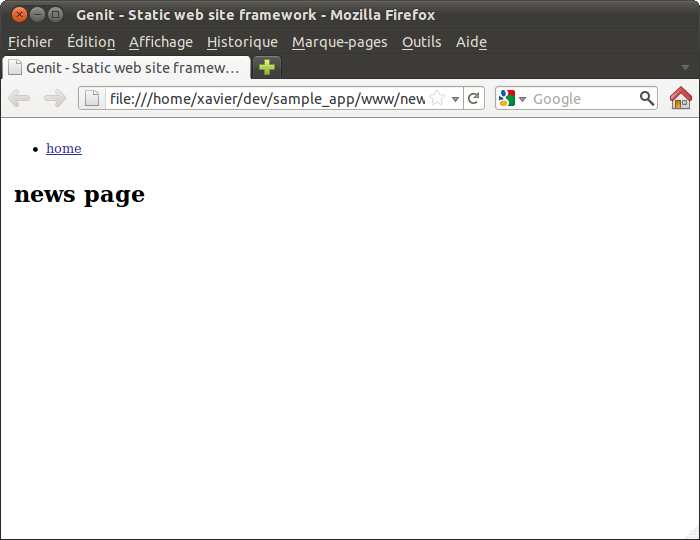
The pages of documentation
We will now create three pages of documentation.
A page for the user documentation (user.html),
a second page for developer documentation (developer.html),
and finally a last page that will include links to the previous two pages
(documentation.html).
As for the news page, you create these pages in the src/pages folder.
Figure 2.6
shows what your src/pages folder should now look like:
    $ ls src/pages/
    developer.html  documentation.html  index.html  news.html  user.html
You will fill these files with the contents of listing 2.3, listing 2.4 and listing 2.5.
Listing 2.3 -pages/developer.html file
<h1>developer page</h1>
pages/user.html file
<h1>user page</h1>
pages/documentation.html file
<h1>documentation page</h1>
<ul>
<li><a href="user.html">User documentation</a></li>
<li><a href="developer.html">Developer documentation</a></li>
</ul>
A new compilation and you can see the result by opening localhost:3000/documentation.html in your browser. Try the links to make sure they work.
In a real site, you might have dozens of pages of documentation.
In this case, I prefer to organize the pages folder in subfolders.
Let's go!
You create the subfolder src/pages/doc in which you move the 3 files
previously created (figure 2.7) :
pages folder
    $ ls src/pages/
    doc/  index.html  news.html
Then you rename the file
src/pages/doc/documentation.html
to
src/pages/doc/index.html
(figure 2.8),
which is a common practice.
Thus, if a user requires the doc folder in their browser, the server will provide the
doc/index.html file.
documentation.html renamed to index.html
    $ ls src/pages/doc/
    developer.html  index.html  user.html
It remains to modify the links of the pages/doc/index.html file
(listing 2.6) :
pages/doc/index.html
<h1>documentation page</h1>
<ul>
<li><a href="doc/user.html">User documentation</a></li>
<li><a href="doc/developer.html">Developer documentation</a></li>
</ul>
Recompile your site and open localhost:3000/doc in your browser to see that the links still work as before.
Information
With Genit, as with most other web frameworks, you write internal links to your site relative to the root of the site.2.4 Menu
You may have noticed the link home at the beginning of each web page you
open in your browser.
This is the default menu of Genit and it is in the
src/templates/menu.html file. Here are the content
(listing 2.7) :
src/templates/menu.html
<ul id="menu">
<li><a href="index.html">home</a></li>
</ul>
We are going to add links to the news page and to the documentation page. Edit it as follow (listing 2.8) :
Listing 2.8 - New content ofsrc/templates/menu.html
<ul id="menu">
<li><a href="index.html">home</a></li>
<li><a href="doc/index.html">documentation</a></li>
<li><a href="news.html">news</a></li>
</ul>
Recompile the project and then open a page to see changes (figure 2.9). Feel free to try the menu links!
Figure 2.9 - The new menu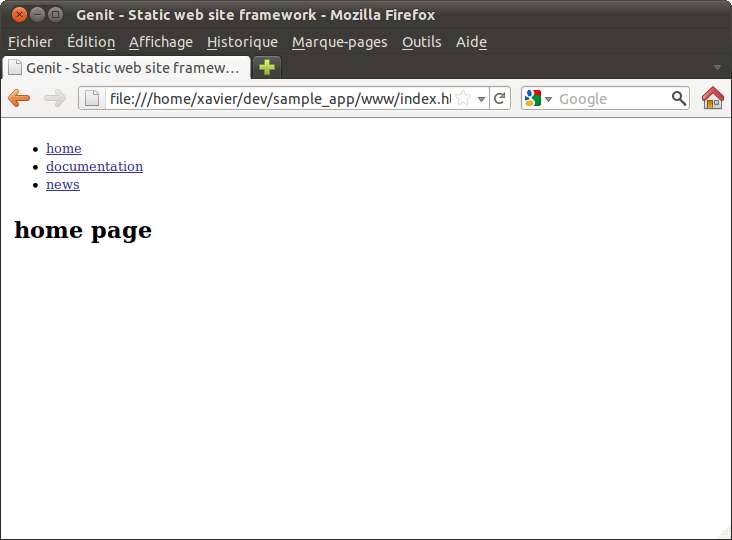
2.5 Main template
Before concluding this chapter we have yet to see the main template.
This is the central file of your site.
The one in which all pages are included.
You will find it in src/templates/main.html. See its content in
(listing 2.9) :
src/templates/main.html
<!DOCTYPE html>
<html lang="en">
<head>
<meta charset="UTF-8"/>
<title>Genit - Static web site framework</title>
<link rel="stylesheet" type="text/css" media="all" href="styles/alsa/all.css" />
<link rel="stylesheet" type="text/css" media="screen" href="styles/screen.css" />
<link rel="stylesheet" type="text/css" media="print" href="styles/print.css" />
</head>
<body>
<genit class="menu" />
<genit class="pages" />
</body>
</html>
Information
Note thegenit tags.The
<genit class="menu" /> tag includes the menu and the
<genit class="pages" /> tag includes web pages.
Warning!
All tags MUST be closed.Particularly, don't forget to close
meta and link tags.
We will add a header and a footer on all pages on the site. As these change all the pages of the site,
we do it in the main template.
Edit the src/templates/main.html file as follow
(listing 2.10) :
src/templates/main.html
<!DOCTYPE html>
<html lang="en">
<head>
<meta charset="UTF-8"/>
<title>Amazing game</title>
<link rel="stylesheet" type="text/css" media="all" href="styles/alsa/all.css" />
<link rel="stylesheet" type="text/css" media="screen" href="styles/screen.css" />
<link rel="stylesheet" type="text/css" media="print" href="styles/print.css" />
</head>
<body>
<div id="header"><h1>Amazing game</h1></div>
<genit class="menu" />
<genit class="pages" />
<div id="footer">Powered by Genit</div>
</body>
</html>
You just have to recompile the project to see the result (figure 2.10) :
Figure 2.10 - A page with a header and a footer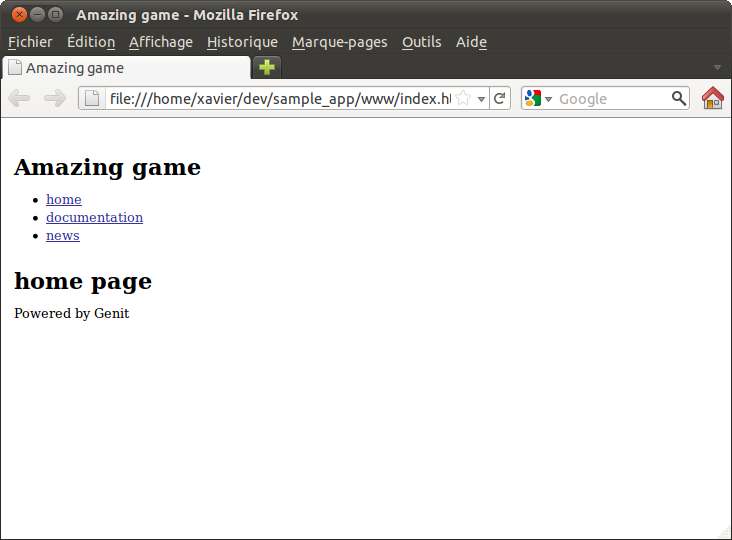
2.6 Exercises
2.6.1 Statement
-
Add a download page on the site. Name it
download.htmland fill it, for the moment, as the other pages, with a headline of level 1. -
Add a menu entry for the
download.htmlpage.
2.6.2 Solution
To add a download page, create a src/pages/download.html file
and fill it with the
content of listing 2.11
src/pages/download.html
<h1>download page</h1>
To add the download.html page to the menu, Edit the
src/templates/menu.html filme as in
listing 2.12
src/templates/menu.html
<ul id="menu">
<li><a href="index.html">home</a></li>
<li><a href="download.html">download</a></li>
<li><a href="doc/index.html">documentation</a></li>
<li><a href="news.html">news</a></li>
</ul>
3. CSS
In this chapter we will see how to add style to your site.
3.1 Styles folder
Open the src/templates/main.html file in your editor and
locate the following line (listing 3.1) :
.
.
.
<link rel="stylesheet" type="text/css" media="screen" href="styles/screen.css" />
.
.
.
This line uses the styles/screen.css CSS file, that will contain your
CSS rules for the media screen (the screen).
If you open the styles folder, you will see this
(figure 3.1) :
styles
    ls styles/
    handheld.css  images/  print.css  screen.css
The images folder will contain of course the graphics files of your design.
Information
You do not have to use the basic style sheets provided by Genit. You use what you want. Simply put the content of your CSS framework in thestyles folder and call it from the main template (src/templates/main.html).
3.2 Preparing the site
We will now prepare the site to receive some style.
The first thing we do is to add some content to the home page.
We will add a download button and a paragraph of text whatsoever.
Later in the book, the text will be replaced by the news.
Open the src/pages/index.html file
in your editor and modify it to look like listing 3.3 :
<h1>home page</h1>
<p><a href="download.html" class="download_button">DOWNLOAD</a></p>
<p>
"Lorem ipsum dolor sit amet, consectetur adipisicing elit, sed do eiusmod
tempor incididunt ut labore et dolore magna aliqua. Ut enim ad minim
veniam, quis nostrud exercitation ullamco laboris nisi ut aliquip ex ea
commodo consequat. Duis aute irure dolor in reprehenderit in voluptate
velit esse cillum dolore eu fugiat nulla pariatur. Excepteur sint occaecat
cupidatat non proident, sunt in culpa qui officia deserunt mollit anim
id est laborum."
</p>
We still have to tweak the template (src/templates/main.html) as in
le listing 3.4 :
<!DOCTYPE html>
<html lang="en">
<head>
<meta charset="UTF-8">
<title>Amazing game</title>
<link rel="stylesheet" type="text/css" media="screen" href="styles/screen.css" />
<link rel="stylesheet" type="text/css" media="print" href="styles/print.css" />
</head>
<body>
<div id="header"><h1>Amazing game</h1></div>
<div id="content">
<genit class="menu" />
<genit class="pages" />
</div>
<div id="footer">Powered by Genit</div>
</body>
</html>
So, your project is ready to be stylish ...
3.3 Style !
We are now ready to edit styles/screen.css in order to
add our rules. Open it in your editor and copy/paste the contents of
listing 3.5 :
styles/screen.css)
html {
background-color:#F7BF65;
color:#457CAA;
}
#header, #footer {
width:100%;
text-align:center;
}
#header h1 {
font-size:30px;
}
#content {
width:500px;
margin:0 auto;
background-color:#AB9546;
padding:10px 30px;
border-radius:10px;
color:#333;
}
#menu {
text-align:center;
}
#menu li {
display:inline;
list-style-type: none;
margin-left: 5px;
}
#menu a {
font-size:14px;
font-weight:bold;
padding: 5px;
text-decoration:none;
}
#menu a#selected,
#menu a:hover {
border-bottom:5px solid #020;
}
#content a {
color:#020;
}
a.download_button {
background-color:#640000;
text-decoration:none;
font-weight:bold;
color:white !important;
padding:15px 0;
display:block;
width:40%;
text-align:center;
border-radius:10px;
margin:0 auto;
}
a.download_button:hover {
background-color:#900000;
}
As usual, you must compile the project before you see the changes.Once this is done, open localhost:3000 in your browser. It should look like figure 3.3 :
Figure 3.3 - The site with some style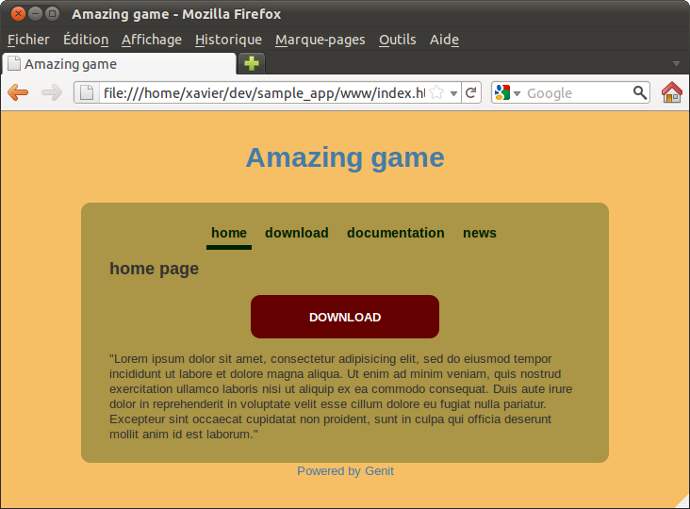
Information
If you put your navigation menu in a listul,
if you give this list an id #menu,
genit will produce an id #selected
on the menu element corresponding to the displayed web page.
For this to work, we need the link
href
of the list element (li)
be the same as the html file.
It's the reason why, at figure 3.3, the menu "Home" is styled.
4. Fragments
Suppose we want to add the download button to the news page. The easiest and fastest way, a priori, is to copy/paste the button code from the index page to the news page. This is what I did in listing 4.1.
Listing 4.1 Button added topages/news.html
<h1>news page</h1>
<p><a href="download.html" class="download_button">DOWNLOAD</a></p>
Once the project is compiled, you can see the result by opening localhost:3000 in your browser (figure 4.1)
Figure 4.1 - The updated news page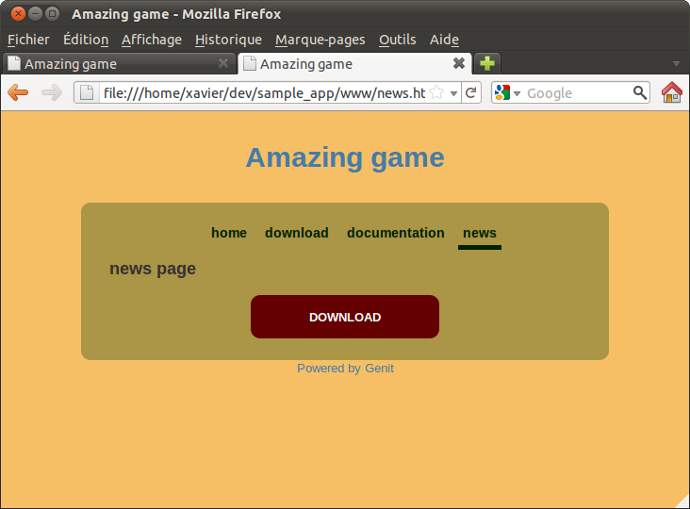
This is a bad solution! If we want to change the button code later, it will make changes twice. When multiple pages share the same code, we need a way to share it. Genit has the notion of fragment sometimes called partial in other frameworks. Fragments allow you to share code and/or modularize large files.
First step, we put the button code in the src/fragments/button.html file
(listing 4.2).
Of course, as this file does not exist, you must first create it.
src/fragments/button.html file
<p><a href="download.html" class="download_button">DOWNLOAD</a></p>
Last step, we need to replace the button code in both files
src/pages/index.html and
src/pages/news.html
by the code in listing 4.3 :
index.html and news.html
<genit class="fragment" file="button.html"/>
Recompile the project and update your browser to see that it works
If you missed something, I put the entire contents of the
src/pages/index.html file (listing 4.4)
and src/pages/news.html file (listing 4.5) :
src/pages/index.html
<h1>home page</h1>
<genit class="fragment" file="button.html"/>
<p>
"Lorem ipsum dolor sit amet, consectetur adipisicing elit, sed do eiusmod
tempor incididunt ut labore et dolore magna aliqua. Ut enim ad minim
veniam, quis nostrud exercitation ullamco laboris nisi ut aliquip ex ea
commodo consequat. Duis aute irure dolor in reprehenderit in voluptate
velit esse cillum dolore eu fugiat nulla pariatur. Excepteur sint occaecat
cupidatat non proident, sunt in culpa qui officia deserunt mollit anim
id est laborum."
</p>
src/pages/news.html
<h1>news page</h1>
<genit class="fragment" file="button.html"/>
5. Passing strings
There will come a time when you want to pass a string from one file to another.
I take a simple example : for now the title bar of the browser window displays
"Amazing game."
I want it to show "Amazing game - Home" when you see the home page,
"Amazing game - Download" when you see the download page, etc.
The problem is that the title bar of the browser is defined in src/templates/main.html,
ie for all pages
(listing 5.1).
src/templates/main.html
<!DOCTYPE html>
<html lang="en">
<head>
<meta charset="UTF-8">
<title>Amazing game</title>
.
.
.
</html>
5.1 The attribute here
Designing a website with Genit not used programming language. So we do not have access to variables.
Nevertheless, XML gives us a simple way to pass strings from files.
Edit the src/templates/main.html file as follow
(listing 5.2) :
<!DOCTYPE html>
<html lang="en">
<head>
<meta charset="UTF-8">
<title>Amazing game - <genit here="window_title"/></title>
.
.
.
</html>
In listing 5.2, attribute here
from code <genit here="window_title"/> defines a place in the file that can be
referenced by the name window_title.
5.2 Attribute what
We can now, in every page, say to Genit what we want to write to the place
referenced by window_title.
Open the src/pages/index.html file in your editor
and insert code from
listing 5.3 at the beginning of the file:
Information
You can write this line anywhere in the file. But at the beginning, your code is more readable and easier to maintain.src/pages/index.html
<genit what="window_title">Home</genit>
.
.
.
Recompile the project to see the result (figure 5.1)
Figure 5.1 - A new title bar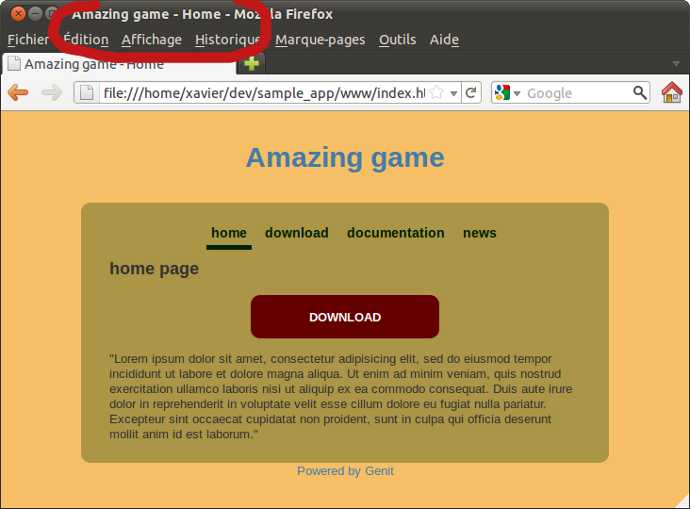
5.3 Exercises
Do the same with every project page.
Page download.html should display in title bar: "Amazing game - Download",
page news.html should display in title bar: "Amazing game - News", etc.
6. News
Few site can do without a news section.
Genit allows you to easily manage your news as part of a static website..
To begin, we will write three news. Then we'll display them all on the news page.
Then we will display just the most recent on the home page.
And finally, we will give them different style rendering.
6.1 THe news folder
The news must be placed in src/news folder.
Their name must be a date in ISO format (year-month-day).
So create the files src/news/2011-09-07.html,
src/news/2011-09-06.html and src/news/2011-09-05.html.
Then fill with the contents of the following three listings(
listing 6.1,
listing 6.2 and
listing 6.3)
src/news/2011-09-07.html
<div class="article">
<h1>Donec quis sapien scelerisque risus hendrerit</h1>
<p class="date">2011-09-07</p>
<p>
Donec quis sapien scelerisque risus hendrerit aliquet id sit
amet risus. Integer sollicitudin, quam mollis rhoncus feugiat,
ligula enim pellentesque sem, vel commodo orci augue quis justo.
</p>
</div>
src/news/2011-09-06.html
<div class="article">
<h1>Vestibulum ante ipsum</h1>
<p class="date">2011-09-06</p>
<p>
Vestibulum ante ipsum primis in faucibus orci luctus et ultrices
posuere cubilia Curae; Nam at felis sed dui lobortis blandit.
Pellentesque habitant morbi tristique senectus et netus et
malesuada fames ac turpis egestas.
</p>
</div>
src/news/2011-09-05.html
<div class="article">
<h1>Lorem ipsum dolor sit amet</h1>
<p class="date">2011-09-05</p>
<p>
Lorem ipsum dolor sit amet, consectetur adipiscing elit. Quisque
at diam arcu. Sed in magna id libero iaculis suscipit quis vel
nulla. Proin sit amet neque purus
</p>
</div>
6.2 View all news
First, let's add a minimum of style to our news. Add the contents of
listing 6.4
to the styles/screen.css CSS file:
styles/screen.css
.
.
.
/* NEWS */
.article h1 {
margin-bottom:0;
}
.article p.date {
font-size:10px;
}
Now we add all the news to the news page, with ease (listing 6.5)
Listing 6.5 -src/pages/news.html
<genit what="window_title">News</genit>
<h1>news page</h1>
<genit class="fragment" file="button.html"/>
<genit class="news"/>
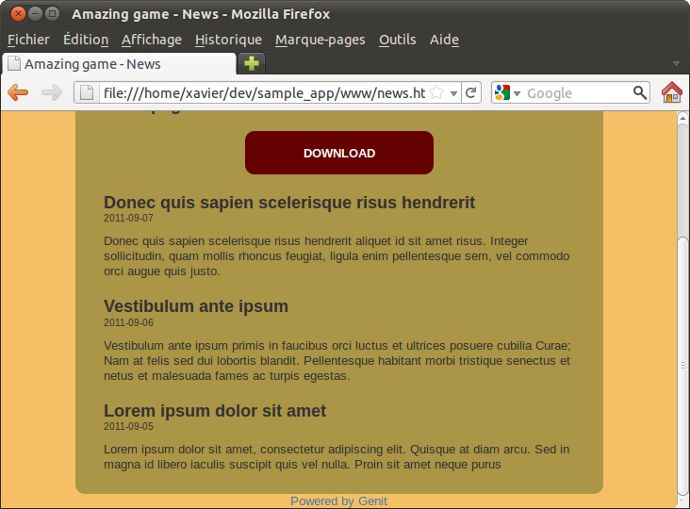
This is the line <genit class="news"/> which takes care of adding news,
from the most recent one to the oldest one.
Once the project is recompiled, here is the displayed news page
(figure 6.1) :
6.3 View latest news
On the home page, we want to display the most recent news. Nothing simpler, see the new code of the home page (listing 6.6) :
Listing 6.6 - Inclusion of the two latest news (src/pages/index.html)
<genit what="window_title">Home</genit>
<h1>home page</h1>
<genit class="fragment" file="button.html"/>
<genit class="news" number="2" />
As usual, once the project is recompiled, you can see the results in your browser (figure 6.2) :
Figure 6.2 - The home page with the most recent news
6.4 Style for news
If we want to give a different style to news posted on the home page and news page, we can already do it easily.
In the src/pages/news.html file,
surround the <genit> tag by a simple<div> tag
(listing 6.7) :
pages/news.html
<genit what="window_title">News</genit>
<h1>news page</h1>
<genit class="fragment" file="button.html"/>
<div class="news_section">
<genit class="news"/>
</div>
Then add the CSS code that will add a line after each news (listing 6.8). Do not forget to recompile the project to see the result.
Listing 6.8 -styles/screen.css
.
.
.
/* A NEWS ON NEWS PAGE */
.news_section .article {
border-bottom:1px solid #020;
}
Genit proposes another solution to manage the style of the news depending on where they are displayed.
You can use the wrapper attribute.
Edit the src/pages/news.html file and modify its contents as in
listing 6.9 :
pages/news.html
<genit what="window_title">News</genit>
<h1>news page</h1>
<genit class="fragment" file="button.html"/>
<genit class="news" wrapper="news_section"/>
The visual will be the same, but the resulting XHTML code is slightly different from that obtained with the code
in listing 6.7,
because this time each news will be surrounded by the
<div class="news_section"> tag.
So use this option if you want, or forget it if you do not like it ...
7. Public folder
The public folder is intended to receive the site files that will be
served without treatment, including:
- media files (images, audio, video) that are not part of the design of the site.
- PDF files
- plain text files
- etc...
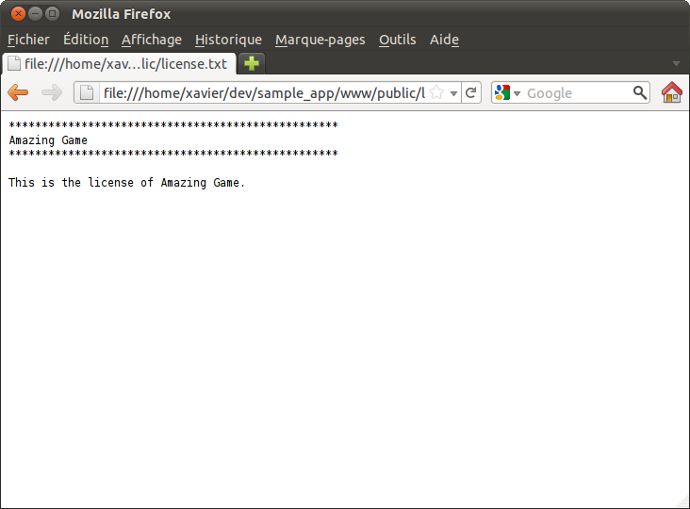
To illustrate this, our website will offer the license for the game in a .txt file.
Create public/license.txt and fill it with the
listing 7.1 (or whatever you want):
public/license.txt
**************************************************
Amazing Game
**************************************************
This is the license of Amazing Game.
Now add the link to this file, in src/pages/doc/index.html
(listing 7.2)
src/pages/doc/index.html
<genit what="window_title">Documentation</genit>
<h1>documentation page</h1>
<ul>
<li><a href="doc/user.html">User documentation</a></li>
<li><a href="doc/developer.html">Developer documentation</a></li>
<li><a href="public/license.txt">Read license</a></li>
</ul>
That's it. Recompile the project, display the src/pages/doc/index.html page
(figure 7.1), and click the link
to display the license (figure 7.2)
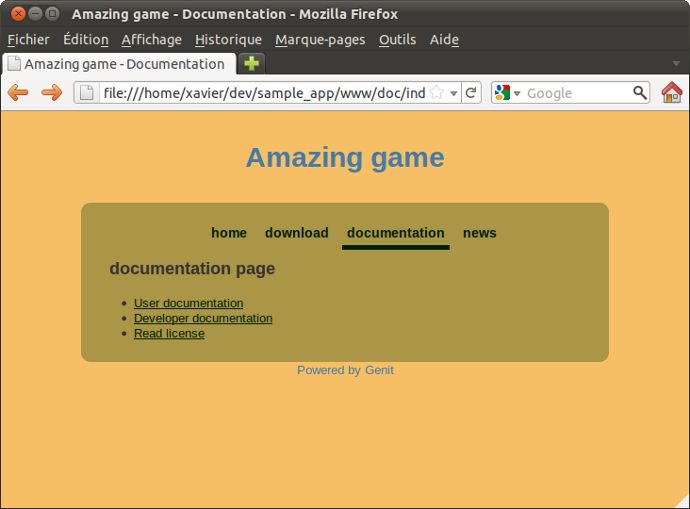 Figure 7.2 -
Information
Another example of using thepublic folder: all the screenshots you see on this page
(as in figure 7.1)
are in the public folder of the Genit site.
8. Javascript
Using javascript on your website is very easy. Simply follow the following convention :
javascript files and libraries goes to the script folder. Nothing more.
To illustrate this, we will add a link to the download page. This link will open a dialog box indicating that the feature is not ready yet.
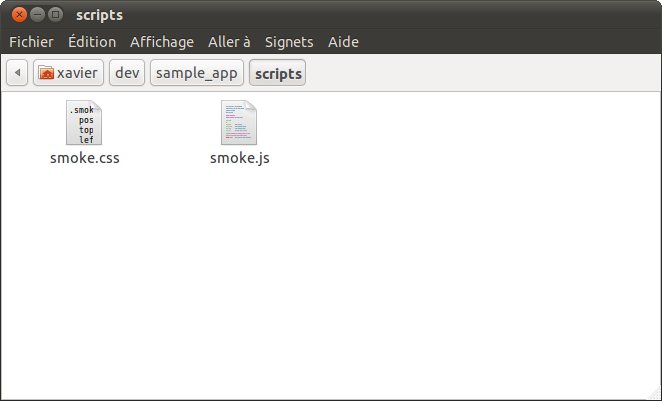
First, download the library smoke.js
and place the two files we need
(smoke.css et smoke.js) in the scripts folder
(figure 8.1) :
Then call these two files in the <head> tag of the main template (src/templates/main.html),
as shown in listing 8.1 :
src/templates/main.html
<!DOCTYPE html>
<html lang="en">
<head>
.
.
.
<script type="text/javascript" src="scripts/smoke.js"/>
<link rel="stylesheet" type="text/css" media="screen" href="scripts/smoke.css" />
</head>
.
.
.
We can now add the link to the download page
(listing 8.2). This link
call the smoke.alert() function from the smoke.js library.
src/pages/download.html
<genit what="window_title">Download</genit>
<h1>download page</h1>
<a onclick="javascript:smoke.alert('Not implemented');" href="#">
Download the amazing game
</a>
As usual, recompile the project and see the new download page (figure 8.2) :
Figure 8.2 - The new download page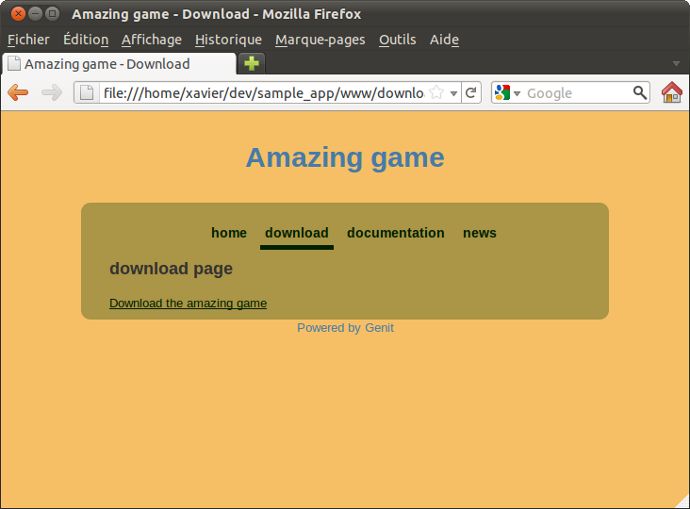
If you click on the link, a nice dialog box will open (figure 8.3) :
Figure 8.3 -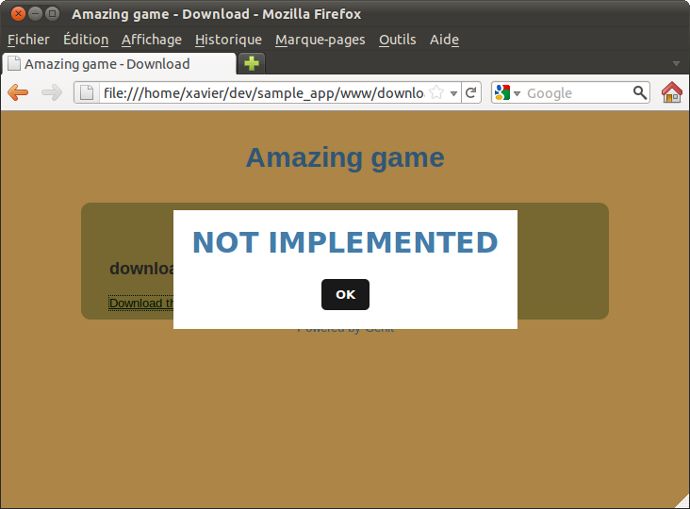
9. RSS Feed and sitemap
Genit can create RSS feed for the news articles of your site.
It too create automatically the sitemap.xml file of your web site.
9.1 The RSS feed
Open the configuration file of your Genit project, this is a file at the root of the project,
named config
(listing 9.1) :
config : configuration file of your project
---
:address: http://www.example.com
:rss: true
:rss_title: RSS TITLE
:rss_description: RSS DESCRIPTION
In the line starting with :address:, change the address to the one of your site.
If you do not already know it, be sure to do it later.
The line starting by :rss: indicates whether or not you want to generate an RSS feed.
If you do not want RSS feeds for your site, change this line to :rss: false.
Lines beginning with :rss_title: and :rss_description: indicates
respectively the title and description of the RSS feed.
Edit the config file as needed, for example
(listing 9.2) :
---
:address: http://www.my-site.com
:rss: true
:rss_title: Title of my feed
:rss_description: Description of my feed
The rss.xml file will be created at the root of the project.
On your site you link the RSS feed with a line like the following
(listing 9.3) :
<a href="rss.xml">RSS Feed</a>
9.2 The sitemap.xml file
Just give the root url of your web site in the config file,
as you did in the previous step
(see listing 9.2). The
sitemap.xml file will be automatically generated in the project folder.
10. Markdown
Markdown format could be use for your fragments, instead of the html format.
To do this, give a .markdown extension to your files and use
the following tag:
<genit class="fragment" file="myfile.markdown"/>
Warning!
Using markdown is limited to fragments and pages folders.11. Haml and Sass
Starting with version 2.1, you could use Haml instead of HTML and Sass (either sass or scss syntax) instead of CSS.11.1 Haml
To create a project with a bunch of Haml files, use the --haml
option.
genit create --haml my_project
Even if you create your project without the --haml option,
you could always use Haml later.
You could use Haml everywhere in the src/ sub folders. You
just have to give a .haml extension to your files.
When you use Haml for a fragment, don't forget to put the right filename in the genit tag:
<genit class="fragment" file="myfile.haml"/>
11.2 Sass
To use Sass instead of CSS is really easy. Just put your stylesheet files (with
.scss or .sass extension) in the styles
folder. In the template you have nothing to do, you reference the files
(in the link tags) as before, as if they where CSS files.
License
Genit is a free, open source software licensed under the MIT license.